How to Create a Webpage
The UNBC website is made of thousands of Webpages. If you would like to add a new page to your site then you will start by creating a Webpage.
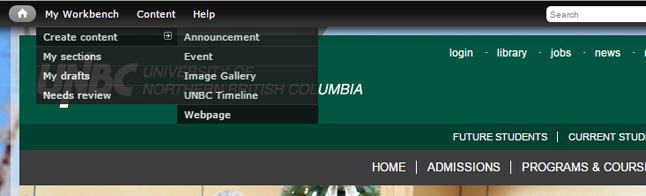
Step 1: “Create Webpage”
In the black toolbar at the top of the page, under My Workbench > under Create content > select Webpage
This brings you to the Create Webpage view. Here you will have a series of fields to fill out.
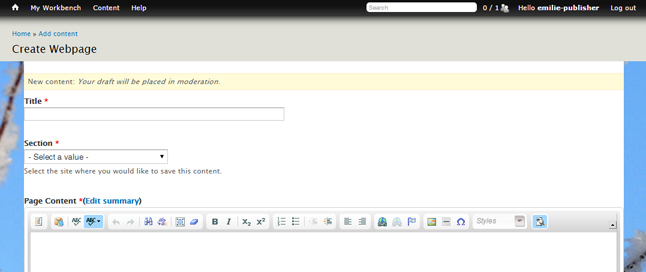
The fields marked with a red asterisk* are mandatory. If the page is saved without filling in one of those fields, the page will not save and you will be directed to fill out the missing field.
Step 2: Give your Webpage a title
The title will appear above the content and below the image rotator.

The title will also define the URL for your new page. For example if your new page in the Education section is titled Course Materials, the URL for the page will be unbc.ca/education/course-materials.
Step 3: Select your Section
Under the Section field, choose the site where your new webpage will belong.

A webpage can only belong to one section of the UNBC website.
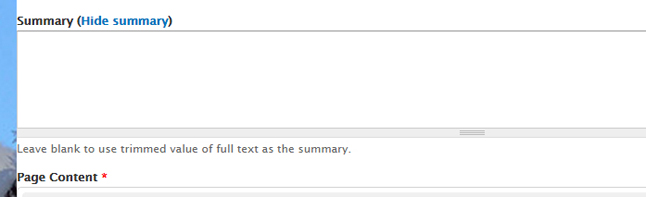
Step 4: Add a Webpage Summary
Next to Page Content, click Edit summary to write the summary.

Once you click Edit summary, a field will appear where you can enter your Webpage’s summary:
In this Google search, the Summary shows up below the title of the search result:
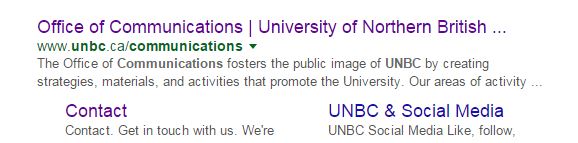
The summary will show up when your page is the result of a search on Google or the UNBC website. *If no summary is defined, search results will display the first 25 or so words on your webpage by default.
Step 5: Add Content
The Page Content field is where you can edit and create content. You can select a template, add images and text, add links to webpages and documents, and much more. We will go into detail on the WYSIWYG editor in other documentation.
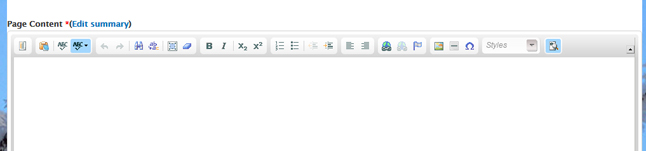
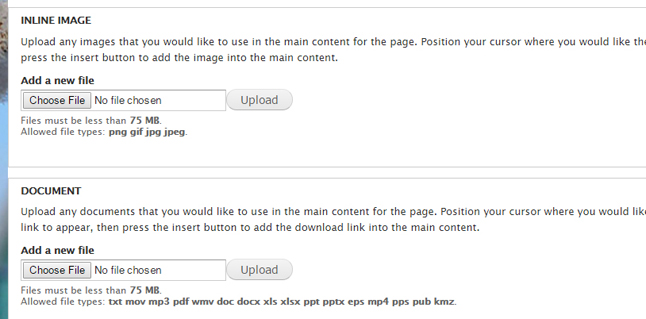
The Inline Image and Document fields allow you to upload images and documents to your webpage.
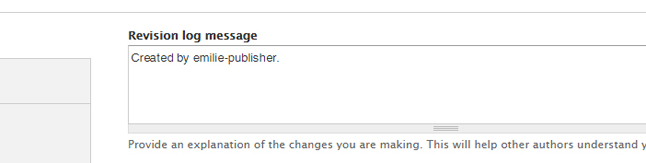
Step 6: Write a Revision Message
Enter a Revision log message to keep track of the changes you make when editing a draft. You will see this message if you choose to look back at older versions of a webpage. This step is optional.
Step 7: Save
You can choose to save your Webpage as a Draft, Published or Needs Review. Under Moderation State, choose how you would like to save.
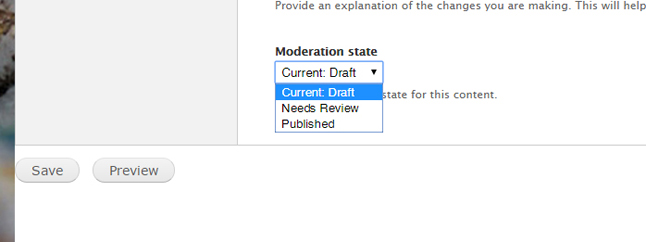
- Draft: Webpage is saved but no changes will appear on website.
- Publish: Webpage is saved and will publish to unbc.ca.
- Needs Review: Saved as a draft and forwarded to supervisor to be approved.
Step 8: Add Page to Navigation
To help web users find your new content, the last step is to include your page in site navigation. Contact the Office of Communications to initiate this by submitting a support request at https://support.unbc.ca. Please include the URL for your new page in your request.